Windows11をパスワード(PIN)なしで起動する
デジドリ COMPINN TOKYO


Windows11では画像編集ソフトのペイントがプリインストールされており簡単に画像編集ができるようになっています。今回はWindows11のペイントで文字を描く方法について解説していきます。
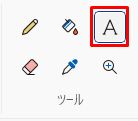
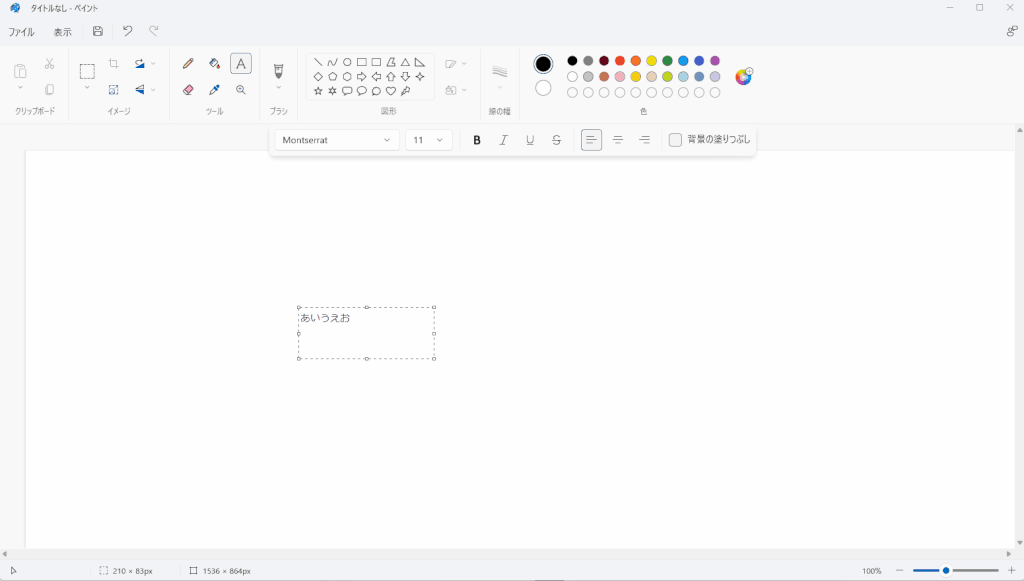
文字を描くときは、まず「ツール」にある「テキストアイコン」をクリックします。
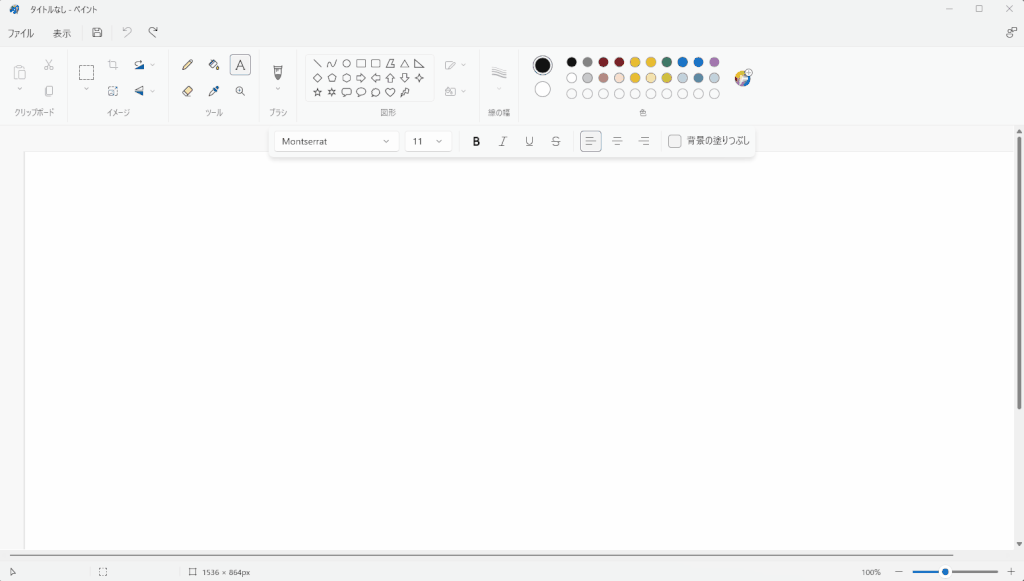
次に「キャンバス」をマウスで左クリックして「テキストボックス」を追加します。
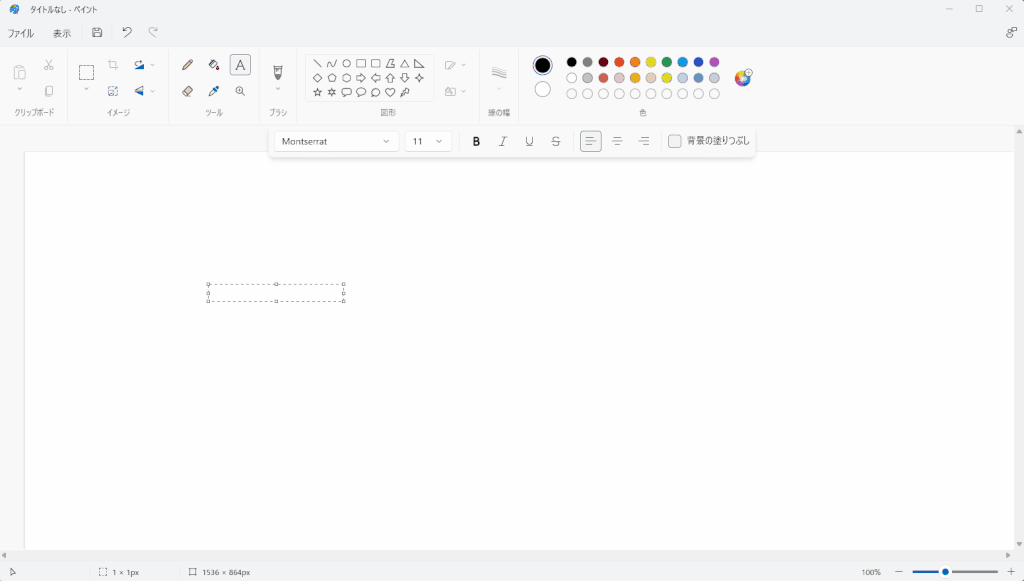
次に「テキストボックス」に表示したい文字をキーボードで入力します。
もし表示位置を変更したい場合は、「テキストボックス」の縁の上にマウスカーソルをあわせ、左クリックしたままマウスカーソルを動かして調整します。
文字の入力と表示位置の調整が終わったら、「キャンバス」の任意の場所を左クリックして、編集を確定させたら完了です。
ペイントでは文字の装飾(フォント・サイズ・色)などのを変更することが可能です。
| 名称 | 内容 |
|---|---|
| フォント | ・文字をどのようなフォントで描くか指定できる |
| サイズ | ・文字をどのぐらいの大きさで描くか指定できる |
| スタイル | ・文字にどのような装飾をつけて描くか指定できる ・装飾は太字・斜体・下線・取り消し線などの中から選べる |
| 文字揃え | ・文字を左揃え・中央揃え・右揃えにするか指定できる |
| 文字色 | ・文字をどのような色で描くか指定できる |
| 背景色 | ・文字を描く、背景を塗りつぶすか指定できる |
文字を描くときのフォントは「フォントのドロップダウンメニュー」から変更できます。

まず「フォントのドロップダウンメニュー」をクリックします

すると「フォントのリスト」が表示されるので、「変更したいフォント」をクリックします。
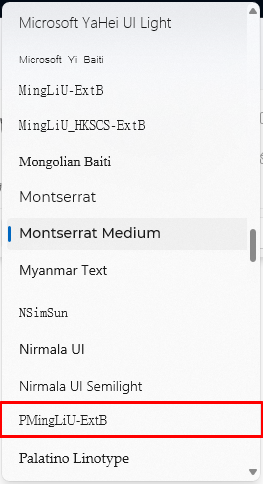
これでフォントの変更は完了で、文字を描くときに、変更したフォントで描くことができます。
文字を描くときのサイズは「サイズのドロップダウンメニュー」から変更できます。

サイズを変更するにはまず「サイズのドロップダウンメニュー」の「下矢印アイコン」をクリックします。

すると「サイズのリスト」が表示されるので、「変更したいサイズ」をクリックします。

これでサイズの変更は完了で、文字を描くときに、変更したサイズで描くことができます。
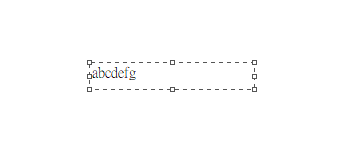
文字のスタイルが複数が用意されており、各アイコンからスタイルを変更できます。

| アイコン | スタイル | 内容 |
|---|---|---|
 | 太字 | 文字を太字にする |
 | 斜体 | 文字を斜めにする |
 | 下線 | 文字の下に線を描く |
 | 取り消し線 | 文字の中心に線を描く |
文字のスタイルは「スタイルのアイコン」をクリックすることで、スタイルの有効・無効を切り替えができます。
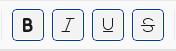
「太字」・「斜体」・「下線」・「取り消し線」のスタイルを有効にすると、以下のように文字を表示できます。

文字揃えとして「左揃え」「中央揃え」「右揃え」が用意されており各アイコンから変更できます。

| アイコン | 文字揃え | 内容 |
|---|---|---|
 | 左揃え | 文字を左に揃えて表示する |
 | 中央揃え | 文字を中央に揃えて表示する |
 | 右揃え | 文字を右に揃えて表示する |
文字揃えは「文字揃えのアイコン」をクリックして、「左揃え」「中央揃え」「右揃え」のうちどれか1つを指定して、変更します。
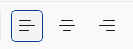
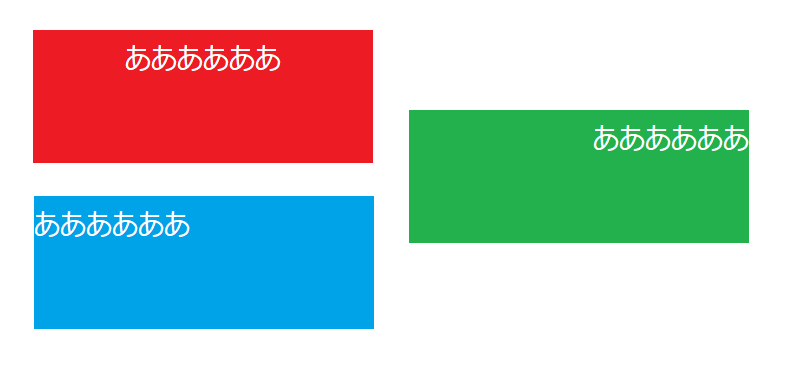
それぞれ「左揃え」「中央揃え」「右揃え」の文字揃えを有効にすると、以下のように文字を描く位置を変更できます。
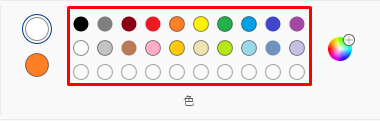
文字色は「色」の「色1」で変更できます。

まずは「色1」を選択します。
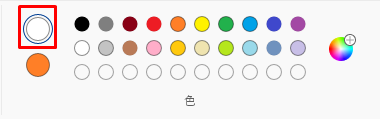
次に「カラーパレット」で好きな色を選択すれば変更完了です。
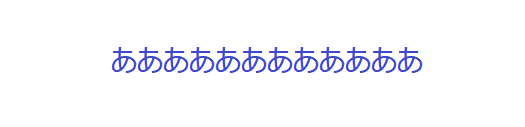
文字色を変更すると、以下のように文字を描く際の色が変化します。
背景色は「色」の「色2」で変更できます。

まずは「色2」を選択します。
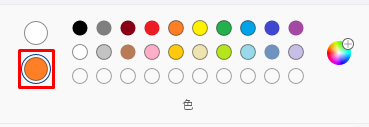
次に「カラーパレット」で好きな色を選択します。
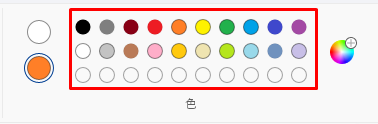
次に「背景の塗りつぶし」にチェックを入れたら変更完了です。

背景色を変更すると、以下のように文字を描く背景の色が変化します。